Kali Linux is a Debian-based Linux distribution developed for penetration testing, and is especially useful for security specialists and enthusiasts. Kali Linux, formerly known as BackTrack Linux, includes a lot of tools and applications for network audits. Kali can be run as a Live DVD, and can be installed on a computer as a host operating system (OS) as any other Linux. However, it is not recommended that you use Kali as a general purpose desktop operating system. At the same time, when using Kali Live DVD, settings are not saved after a system reboot. In this situation, virtual machines can be of great help. Today’s blog post explores how to install Kali Linux on VirtualBox as a virtual machine (VM).
The advantages of installing Kali Linux on VirtualBox are:
Make sure that VirtualBox is installed on your host operating system before continuing, using the latest VirtualBox version if possible. Please install VirtualBox Extension Pack on your host machine to use some advanced features such as USB pass-through. In the today’s blog post, you will learn how to install Kali Linux on VirtualBox on Windows 10. If you wish to know how to install Kali Linux on VirtualBox on Mac, don’t worry – the installation principle is the same, due to the universality and multiplatform nature of VirtualBox. The installation algorithm is similar as that for installing Ubuntu on VirtualBox.
Downloading the Installation Image of Kali Linux
First, go to the official web site and download the ISO image of Kali Linux. There are multiple 32-bit and 64-bit images that have different graphical user interfaces (Gnome, KDE, XFCE, LXDE etc.). Let’s download Kali Linux 64-bit v.2019.2 – this distribution has Gnome as a graphical user interface (GUI). You can download images via HTTP and Torrent protocols. Save the ISO file to a custom folder, for example, C:\VirtualBox\kali-linux-2019.2-amd64.iso. You can also verify the SHA256 check sum to make sure that your image is consistent after finishing downloading.
 | ||
Creating a New VMOnce you have downloaded the installation image, you can create a new VM. Open VirtualBox and create a new VM (Machine > New or Ctrl+N) on which Kali Linux will be installed.
Set the following VM parameters: Name: Kali_x64 Machine Folder: C:\Virtual\VirtualBox (This path is used only for demo purpose. Try not to use a system partition to store VMs). Type: Linux Version: Debian (64-bit) Memory size: 4096 MB. The VM memory size must be large enough to run a guest OS, though you should leave enough unallocated memory to run your host OS. In the current example, a host machine with 16 GB of RAM is used, which provides enough memory left for a host OS. Hard disk: Create a virtual hard disk now. Hit Create to continue and configure a new virtual hard disk. Set the virtual disk file location, for example C:\Virtual\VirtualBox\Kali_x6Kali_x64.vdi It is recommended that you store virtual disk files in the VM folder (such folder is selected by default). Set the virtual disk file size. It should be at least 20 GB. Hard disk file type: VDI. A native VirtualBox format is selected. Storage on physical disk: Dynamically allocated (the analog of thin provisioning in VMware). Click Create to finish creating a new VM. After creating a new VM, some additional settings must be configured. Select your recently created virtual machine and open the VM settings. Display optionsGo to Display > Screen and set Video Memory to 128 MB. It will prevent installer hanging. Next, tick the checkbox Enable 3D acceleration (optional). It will be useful for applications that need 3D acceleration. Network optionsNext, go to the network settings and select the networking mode of the virtual network adapter of the VM. Let’s select the Bridged mode to use the VM network adapter much as you would for a physical network adapter of the host machine. In this case, the VM network adapter is connected to the same physical network as the host machine. You can set additional options such as network adapter name, type, MAC address etc. Boot optionsYou have to insert your virtual ISO DVD image to a virtual DVD drive of the VM and then boot a virtual machine from that ISO disk. In the VM settings, go to Storage, select an IDE controller of your virtual optical drive (it is empty by default). Click the empty status, then click the disc icon near IDE Secondary Master and in the opened menu, select Choose Virtual Optical Disk File. Browse the Kali Linux installation ISO image that you have downloaded from the official site before (kali-linux-2019.2-amd64.iso). Hit OK to save settings. The Step-By-Step Process of Installing Kali Linux on VirtualBoxNow you can start your new VM (Kali_x64 in this case) and begin the Kali installation. After booting from a virtual DVD, you will see a boot menu where you can select boot options for Kali Linux such as Boot from Live DVD, Install, Graphical Install etc. Let’s select Graphical Install. Press Enter to continue. Configure the network. Enter the hostname for your Linux system, for example, kali-virtualbox. Configure the domain name. If you don’t use a domain in your network, you may leave this field empty. Set up users and passwords. Read the useful tips on this screen and enter the password for root. Configure the clock. Now you can select a precise time zone for your country. |
Confirm that you want to erase the disk. There is no reason to worry, as in this case, the empty 20-GB virtual disk is used for partitioning
Select a preferred partitioning scheme for your virtual disk. Let’s select All files in one partition.
Select Yes and confirm that you would like to write changes to the disk.
Configure the package manager. Click Yes if you would like to use a network mirror. Selecting this option will allow you to install or update application packages from online software repositories.
Enter the information about your proxy server if you use a proxy server for internet access from your network. There is no proxy server in this example; so this field is left empty.
Install the GRUB boot loader on a hard disk. Since there is no other operating systems and boot loaders on a virtual disk, it is necessary to install GRUB in this case. Select Yes to install GRUB.
Select a disk to which GRUB must be installed. In this case, /dev/sda is the necessary disk and is the only disk connected to a VM.
Finish the installation. When the installation of Kali Linux on VirtualBox is complete, you will see a notification message. Now you can reboot the virtual machine to boot the Kali Linux installed on the VirtualBox VM.
After the reboot, you will see a login screen of Kali Linux. Enter root as a user name, then enter the password set during installing Kali Linux on VirtualBox to sign in.
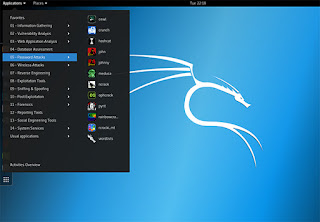
Now you should see the Gnome desktop of Kali Linux installed on your VirtualBox virtual machine.

0 Comments